安装环境:
系统:centos7
java环境:jdk1.8
版本:elasticsearch-7.3.2
elasticsearch下载
官网:https://www.elastic.co/cn/downloads/elasticsearch
博客:https://blog.csdn.net/weixin_37281289/article/details/101483434
将下载的压缩包移动到 /opt/目录下,解压。
tar -zxvf elasticsearch-7.3.2-linux-x86_64.tar.gz
Elasticsearch5.0之后,不能使用root账户启动,所以需要闯创建一个test用户,在test用户中启动
useradd test
chown -R test /elasticsearch-7.3.2
启动elasticsearch
cd /opt/elasticsearch-7.3.2
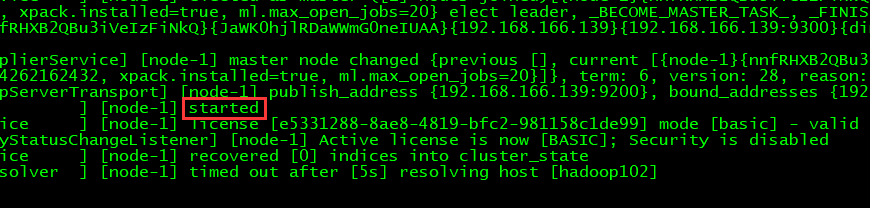
./bin/elasticsearch
执行启动后出现如下则说明成功:
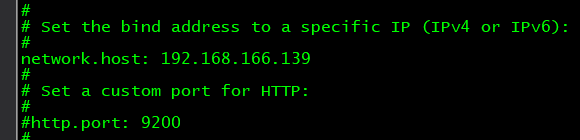
修改config目录下的elasticsearch.yml配置文件,将network.host配置放开,并配置本机ip。
并重新启动:
执行: curl http://192.168.166.139:9200
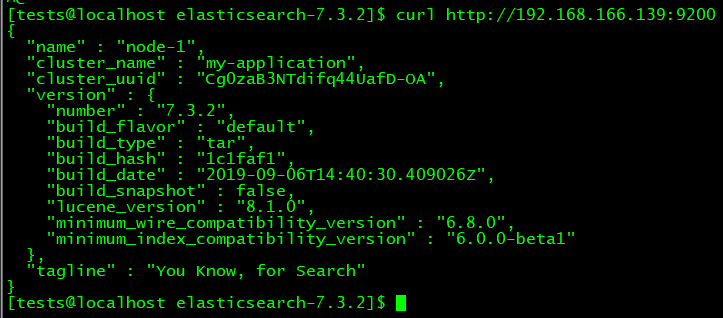
出现上图则安装成功
启动时常见错误
1.ERROR: bootstrap checks failed
max file descriptors [4096] for elasticsearch process likely too low, increase to at least [65536]
max number of threads [1024] for user [lishang] likely too low, increase to at least [2048]
解决方案:
切换到root用户,编辑limits.conf 添加类似如下内容
vi /etc/security/limits.conf
添加如下内容:
* soft nofile 65536
* hard nofile 131072
* soft nproc 2048
* hard nproc 4096
2.max number of threads [1024] for user [lish] likely too low, increase to at least [2048]
解决方案:
切换到root用户,进入limits.d目录下修改配置文件。
vi /etc/security/limits.d/90-nproc.conf
修改如下内容:
* soft nproc 1024
#修改为
* soft nproc 2048
3.max virtual memory areas vm.max_map_count [65530] likely too low, increase to at least [262144]
解决方案:
切换到root用户修改配置sysctl.conf
vi /etc/sysctl.conf
添加下面配置:
vm.max_map_count=655360
并执行命令:
sysctl -p
然后,重新启动elasticsearch,即可启动成功。